Making a 2.8 induction kit
Introduction
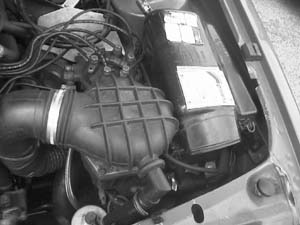
One of the key complains about the 2.8 V6 found in the XR4 range is the lack of any induction kit available. As we all know there are many advantages to be had from better air filters, in particular induction roar which the engines sadly lack. Understandably Ford designed the XR4 airbox to minimise induction noise but sadly constructed the assembly making it very difficult to modify.
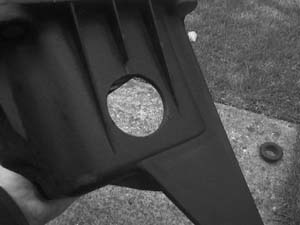
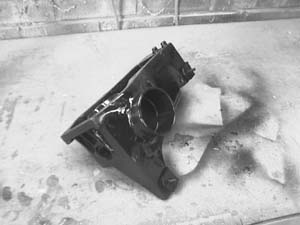
I can see why no air filter companies offer an induction kit, as you can see pictured the air box is moulded into one piece with inside section acting as a bracket for the underside of the injection system. There is no practical way of bolting a filter on, this guide will show you how to adapt the existing airbox to accept a high performance air filter.
 |
 | |
| Couldn't suck a flea of a Chiuaua's backside | You ugly! |
Preparation
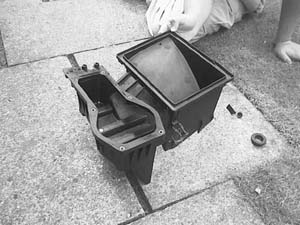
If you use your car every day you do not want to modify your existing airbox, I highly recommend you visit the local scrap yard to obtain another. I found it surprisingly difficult to actually find a 2.8 XR4 with an airbox still in. It seems there is an airbox eating monster in my area so if you see one get it quick! Removal is pretty simple. You may need to remove the injection system, just requires a large Philips screwdriver. The airbox assembly is bolted onto the wheel arch. You may have to unbolt it from behind the wheel, there should only be three 10mm bolts. It could be worth taking a small pad saw with you as the mounting bolt for the out side airbox bracket maybe corroded due to its location, you can saw this bracket off, you do not need it. Make sure you do not damage the inner two brackets on removal. Take the whole assembly bar the lid for the filter (make sure you take the rubber sleeve for the anti stall valve), going rate for an XR4 airbox appears to be £4
The first step is to clean the whole assembly up with some shampoo and water, I even gave mine a blast of Back To Black spray to make it look new. Now all you need is a small plastic saw.
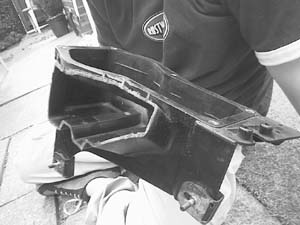
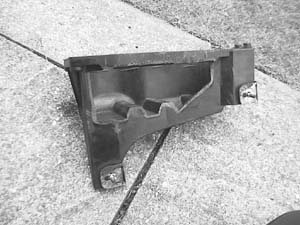
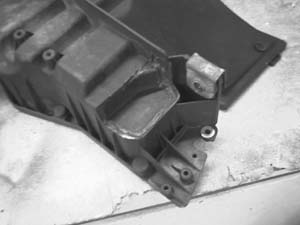
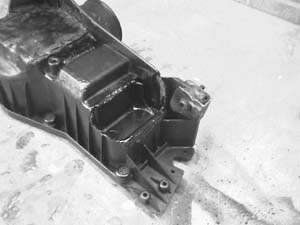
Start by cutting the entire filter side of the airbox off, there's no need to be careful at this stage, you're just giving yourself room to work on the part you'll keep. I just sliced right down the middle of the joining section. With the bulk of what's not needed cut off you can remove and keep the rubber sleeve for the anti stall valve and throw that piece away. Now you can trim off all the joining section moulded onto what's left of the airbox, try to be neat as possible and make sure to keep the upper ring all intact. You should now have a section of airbox with gaping hole in the side.
 |
 | |
| Half the box removed | Trimmed and ready for action |
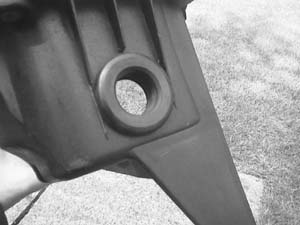
You will need to re-locate the anti stall valve as its designed to fit into the bottom of the airbox section you just cut off. Simply drill a 30mm hole into the front of your trimmed airbox section and refit the rubber sleeve in place, I hope you saved it like I said! I drilled directly into the middle plastic rib on my airbox placing the hole in between the other two ribs. To refit the rubber sleeve neatly use some long nosed wire cutters to 'nibble' a section out of the ribs. Careful when doing this, the pieces can fire into your eyes.
 |
 | |
| Hole cutter needed here to be this neat | Trim the ribs with cable cutters or a saw |
Idea: Instead of relocating the anti stall valve into the airbox you could use a pipe designed for fitting a dumpvalve between the airbox and your cone filter.
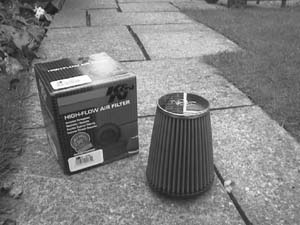
The Cone Filter
You can be creative your filter selection, all you need to do is clamp a filter onto a piece of pipe your going to graft onto your airbox. I have chosen K&N as they produce a large selection of various clamp on filters which are available to buy online from http://www.filterpower.com/universal/kn_tapered_clamp.htm
The two filters you want to look at are the RC-2600 (£28) and RC-3250 (£45). The smaller filter is adequate for a standard 2.8 however higher power cars (above 160bhp) will require the larger filter that can handle up 260bhp normally aspirated or 468bhp on a turbo. If you want a lot of induction roar then go for the bigger filter. As a result you are going to need to find either a 73mm or 79mm piece of pipe.
 |
| I can hear it roaring already |
Turbo
only
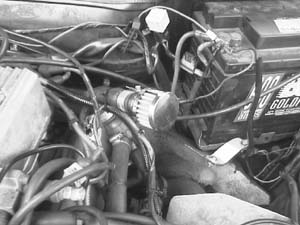
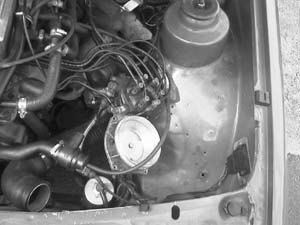
Meanwhile back at the engine bay there is the issue of the oil
breather pipe that currently resides in the top of the airbox lid. It's an
MOT failure to have the oil breather venting directly into the atmosphere
so this can be remedied in two ways. You could simply cut a hole in the
back of the K&N and extend the pipe to fit into this. Easier is to buy
a oil breather filter which looks like a tiny K&N filter, £7 will get
you a non branded one. On my breather I could simply remove the pipe
extension and slot the breather on. This may not be the case if your 2.8
has a turbo conversion as many breather systems were recalled and
redesigned. Therefore I suggest you take a look at your engine first and
see if it's different.
 |
| Fancy oil breather |
Hack, fill, sand and spray
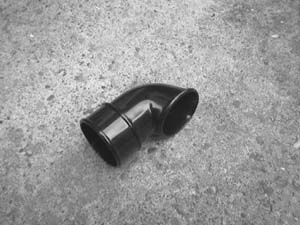
Right to continue constructing the modified box your going to need a pipe to fit your air filter. The RC-3250 has a 78mm hole, (about 3inches) which is drainpipe sized. Obviously your going need to find a different sized pipe if your filters different, I chose to use a drainpipe 'shoe' which is a right angle piece. Don't bother using the same, you'll only have to cut it apart - use straight pipe!
 |
 | |
| The only 3" diameter pipe I could find | These kits a cheap but the fibreglass mat is very coarse |
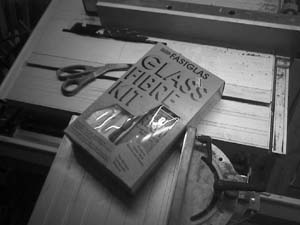
While you out measuring bits of pipe pick up some fibreglass and some filler - oh yes this is going to get fun.
 |
 | |
| This is what we're after - but without the tape! | A bit of trimming needed under here. |
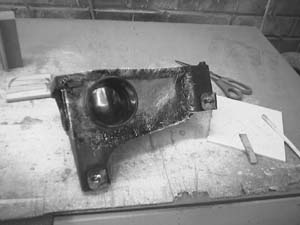
If your using a big pipe like me you might have to cut a rib out of the bottom of the air box to fit it in. Just hack away with the pad saw till it fits and use fibreglass resin or Araldite to hold it in place. Now go put some old clothes on because its fibre glass time. You need to basically fibreglass up the holes and use filler to smooth off the surface (make sure its all airtight) then spray it all satin black. Plasticote works wonders.
 |
 | |
| Fibreglassed up and ready for lots of filler | A quick blast of paint |
Out with the old in with the new
Follow the same procedure as in the scrap yard to remove the current airbox, you can then simply attach the cone, which should have arrived by now, and you're ready to go. You may need to adjust the mixture slightly as the breathing characteristics have changed.
Turbo
only
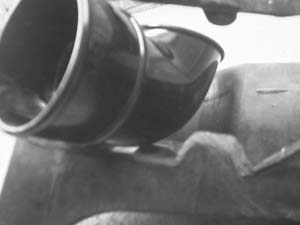
Your going to have to do some more hacking - the back of the
airbox is too close to the turbo! You simply need to cut a section out of
the box to match the existing box, which turbo technics will have adapted
already.
 |
 | |
| Turbo Technics 'proffesional' bodge | No too difficult to imitate |
 |
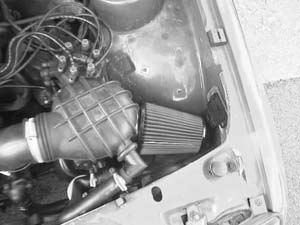 | |
| Oh no! What have I done? | Hurrah! Finished! |
Results
Well it fits and looks good, sadly I can't comment on induction roar since mines a turbo. I had never used fibreglass before and managed to get a neat looking box in the end. Its hard to tell from the pictures but you need to angle the pipe more towards the front corner of the car then I did, luckily my filter just fitted on. It takes only a few days to do and cost me about £70 if you include all the tools and materials.